
How to Hook Rugs from Start to Finish
A Free Beginner How to Course in Hooking Rugs
compliments of Deanne Fitzpatrick Rug Hooking Studio
Hooking rugs is easy. You can even teach yourself. You pull strips of wool cloth, usually recycled clothing, washed , dried , and torn apart through a burlap or linen backing loop by loop. There are no hard and fast rules. The simplest way to learn is to pick out a kit at our online shop or you can start from scratch. We have a free instructional video to teach you how to hook. Either way these are the basic steps you will need to know:

Getting Started
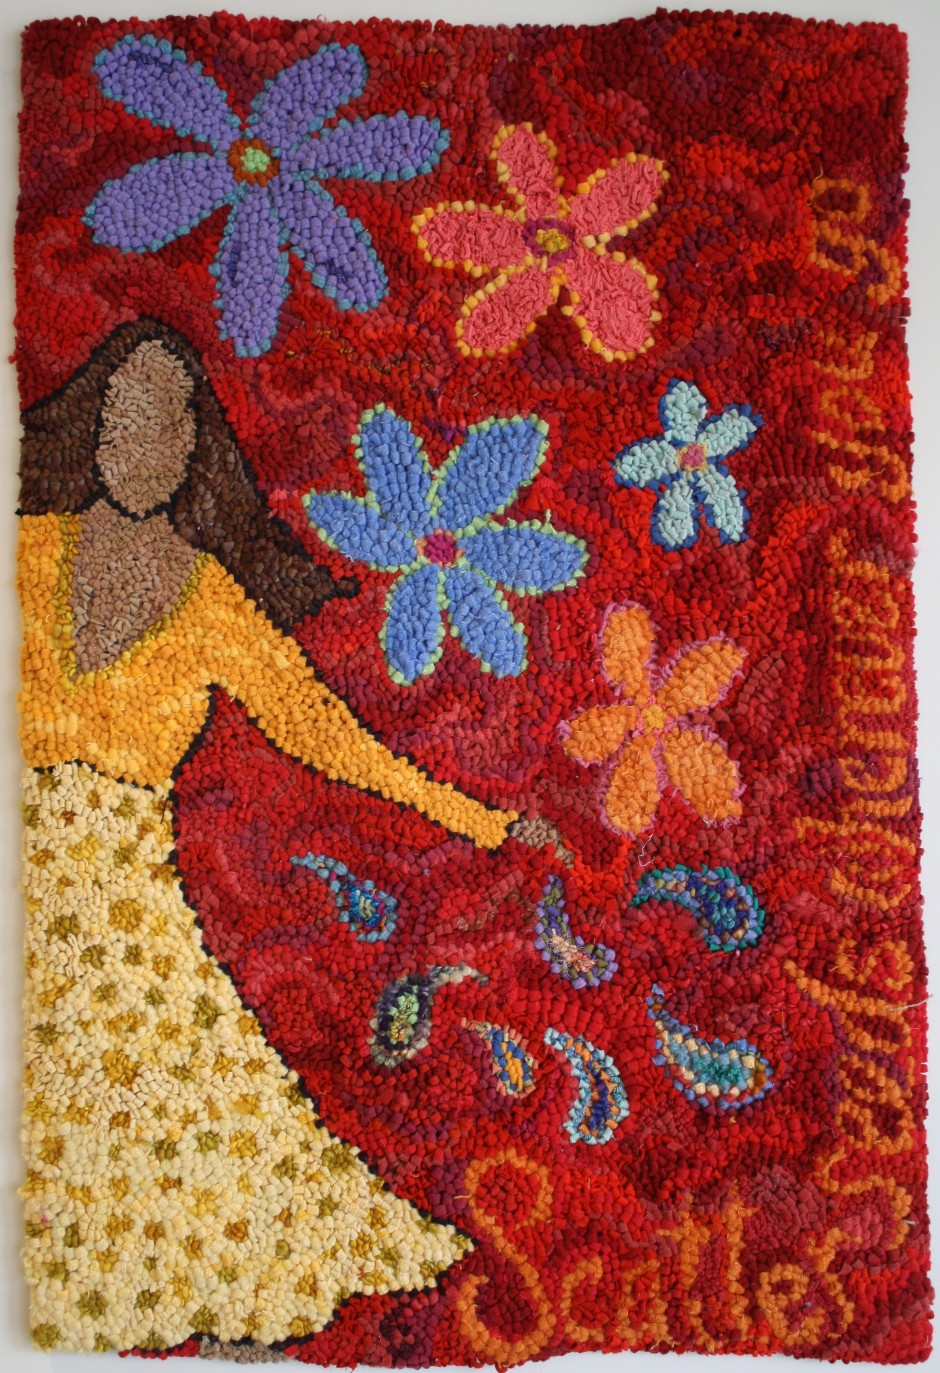
The rug above is my very first project. I went off to a meeting of the Nova Scotia Rug Hooking Guild at the Tatamagouche Centre and Marion Kennedy sold me a kit and and taught me how to hook rugs. As I was hooking, she pointed out some mistakes I was making and I asked her, “Should I pull it out and start again?” She said, “Don’t do that you will learn as you go along. Finish it, that’s your job, finish it.” With less than three square inches of the rug hooked this seemed like a dauntingly job but it wasn’t. It turned out that as I kept at it , I learned as I went along. I kept her voice in my head, “finish the mat” and I finished this first project with in a week, and quickly moved on to design my next rug.
Rug Hooking is a simple craft that you can easily teach yourself. I recommend a kit for beginners because you have everything you need to get started.Here are some basic instructions for rug hooking. You can also learn lots more through our online courses or studio workshops.

1. You first fasten your pattern, which is a piece of burlap with a picture drawn upon onto a frame such as a heavy duty quilting hoop, or a stretcher bar.
2. Cut a strip of wool cloth about one quarter an inch wide, and about eight to twelve inches long.
3. Hold your hook in the hand you use to hold your pencil, and the strip of wool in the other hand. Put your hook down through a hole in the burlap backing, and catch the piece of wool, pulling it up thru the burlap. Bring the first end right up through, then continue the hooking pulling it up loop by loop.
4. In primitive hooking , you generally start by outlining an area and then filling it in.
5.Continue hooking until the whole mat is done. Bring all your ends of wool to the surface and clip them evenly with your loops.
6.When you finish your project, cut the excess burlap away from the edge, leaving no more than two inches all around. Use this to bind the rug by folding it and sewing it along the backside of the rug. You can also use cotton twill tape to bind it along the edge.
7.The final stage is to press you rugs with a wet cloth and hot iron on both sides to even out the loops and give your rug a finished look

Videos and How To That Tell You the Basics of Hooking Rugs:
- Kits and Frames from the Studio
-
How to make your rug hooking into a pillow
-
A Lesson on Binding and Finishing Rugs
-
How to Assemble a Cheticamp Frame
-
How to Hang a Hooked Rug
-
The Art of Rug Hooking Video
Some of the kits from our online shop:


You can also learn on our online courses or studio workshops.


“Finish it, that’s your job” – easier said than done but just what I did yesterday! Two years ago I purchased my first kit from your shop in Amherst, one of your Big-Boned Girls, and for almost a year it has been waiting for me to finish the edges but after taking Deanne’s very stimulating first online rug hooking course this winter, I just wanted to get started on about 19 new projects (after hitting all the local thrift stores for wool jackets, skirts, and anything I could get my hands on and then organizing it on newly arranged shelves – another online course suggestion) and wasn’t completing anything. When I decided I wouldn’t give myself permission to start a new project until I finished my others, I picked up the Big-boned Girl, added a border, stitdched the edges down and am thrilled with it – took a picture too (just like Deanne)!
LikeLike
Your blogs are magnifico. If this one doesn’t get the would be rug hookers going, I don’t know what will. You motivate one to strive hard with what ever creative instinct they may have. I am enjoying the latest UTube demonstrations they bring you closer to your fellow hookers.
LikeLike